Content Quick Overview
What to Do When Your WiFi is Connected but You Have No Internet Access
Experiencing a WiFi connection without internet access is a common issue reported by many users, particularly in environments such as public spaces like airports and hotels. This situation, while frustrating, can stem from several underlying factors.
In public networks, this problem is often attributed to network restrictions or firewalls that limit access to certain users or devices. Public WiFi networks inherently come with risks, including limited security and potential interference from high user traffic. However, similar issues can also occur in private networks at home or in the workplace.
When faced with the “WiFi connected but no internet” scenario, there are two primary areas to investigate: the router and the connected devices.
1. Check the Router
If none of the devices connected to your WiFi network can access the internet, the issue is likely with your router or modem. To confirm this, inspect the router’s signal indicators. A malfunction is often indicated by irregularities in the signal light, such as slow blinking or the absence of flashing. Restarting the router or checking with your internet service provider may resolve the issue.
2. Check Your Devices
If the problem appears isolated to a specific device, such as a laptop, despite the WiFi connection showing a strong signal, the issue may lie with the device itself. This could include misconfigured network settings, outdated drivers, or hardware malfunctions. Verifying the network settings and performing basic troubleshooting on the device can often help identify and resolve the problem.
By systematically addressing both the router and connected devices, you can efficiently pinpoint and resolve the issue, ensuring a stable internet connection.ection. Opening a browser and seeing a “No Internet” message when trying to search confirms this problem.
Why Is Your WiFi Connected But There’s No Internet Connection?
Network connection issues, while frustrating, are often less complicated than they may seem. Several common factors can cause your WiFi connection to fail when attempting to access the internet. These include:
• IP Address Conflicts: Duplicate IP addresses on the network can disrupt internet access, even if the WiFi appears connected.
• Router or Modem Issues: Your WiFi router or modem may not be transmitting an internet signal effectively due to hardware malfunctions or incorrect settings.
• Antivirus or Security Applications: Overzealous antivirus software or other security applications can inadvertently block internet access.
• Unpaid Broadband Bills: An overdue broadband tariff payment can lead to service interruptions.
• Outdated Network Adapter Drivers: Network adapters with outdated or faulty drivers can fail to establish a proper connection.
• Default WiFi Settings: Some routers or modems have WiFi disabled by default, requiring manual activation.
These factors represent a broad overview of common issues that result in the “WiFi connected but no internet” error. Among these, IP address conflicts stand out as a frequent culprit, disrupting access even when the connection status seems normal. In the following sections, we’ll explore targeted solutions to help you diagnose and resolve these issues efficiently.
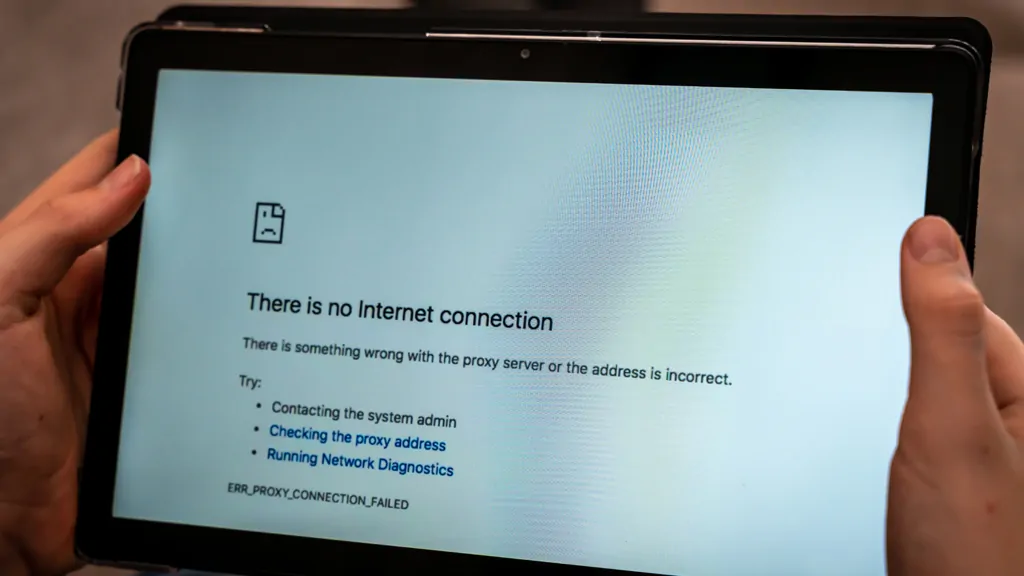
IP Address Conflicts: A Common Cause of “No Internet” Errors
In a network, every device must have a unique IP address to communicate effectively. If two devices are assigned the same IP address, it results in an IP address conflict, which is a frequent cause of the “WiFi connected but no internet” issue.
This conflict occurs because the network cannot distinguish between the devices, leading to communication errors and interrupted internet access. To resolve this issue, follow these steps:
1. Identify the Conflict: Determine which devices on the network are using the same IP address. This can often be done by checking your router’s admin interface or running a network diagnostic tool.
2. Reassign the IP Address: Change the conflicting device’s IP address to a unique one. This can typically be done by:
• Manually assigning a new IP address in the device’s network settings.
• Releasing and renewing the IP address using the command prompt (ipconfig /release and ipconfig /renew on Windows or sudo dhclient -r on macOS/Linux).
• Restarting the router to allow automatic reassignment through Dynamic Host Configuration Protocol (DHCP).
By resolving IP address conflicts, you can restore uninterrupted internet access and improve overall network stability.IP address = network address + host address
Simply put, an IP address is the same as your home address. Comparing the internet to the real world, when someone sends you a letter, he needs to know your address to send the letter to you. Likewise, when someone sends you a message, the Internet host needs to know your IP address to send the message to you accurately.
How to Resolve IP Address Conflicts?
Please note that only devices connected to your network may cause IP address conflicts. For example, suppose only one device is connected to your network. In that case, no internet is unlikely to be caused by an IP address conflict unless someone is secretly rubbing the internet.
Resolving IP Address Conflicts: A Key to Restoring Internet Connectivity
In any network, each device must possess a unique IP address to enable seamless communication. When two devices are inadvertently assigned the same IP address, it creates an IP address conflict. This issue is a common cause of the “WiFi connected but no internet” error and disrupts network functionality.
An IP address conflict arises because the network is unable to differentiate between the conflicting devices. This ambiguity prevents proper communication and results in lost internet access. Fortunately, resolving this issue is straightforward with the following steps:
1. Identify the Conflict:
Pinpoint which devices on the network are assigned the same IP address. This can be done by accessing the router’s admin panel or using network diagnostic tools that display connected devices and their IP addresses.
2. Reassign a Unique IP Address:
Address the conflict by ensuring each device has a distinct IP address:
• Manual Reassignment: Update the IP settings on the conflicting device to assign a unique address.
• Release and Renew: Use system commands to reset the device’s IP address allocation:
• On Windows: Run ipconfig /release followed by ipconfig /renew in the command prompt.
• On macOS/Linux: Use the command sudo dhclient -r to release and renew the IP address.
• Router Restart: Reboot the router to reset IP assignments automatically via Dynamic Host Configuration Protocol (DHCP).
By eliminating IP address conflicts, you can restore internet connectivity and enhance the overall efficiency of your network. Regularly monitoring and managing your network settings can also prevent similar issues in the future.
The following operation uses Windows 7 as an example:
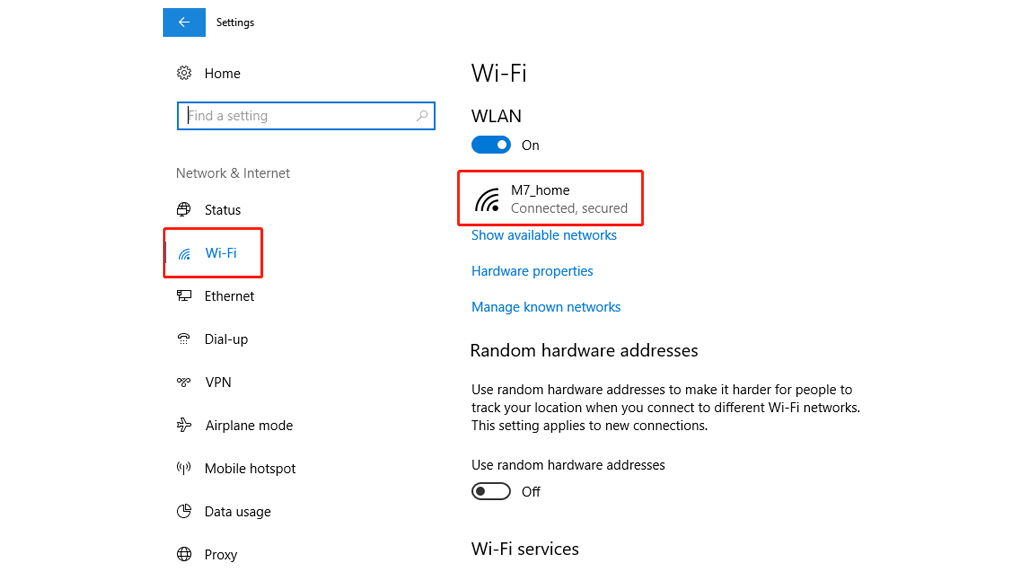
- Make sure your devices are connected to the internet
- Open the Computer Settings > click the Network&Internet > Wi-Fi > chose your connected network > IP settings
- If your IP assignment is Manual, change it to DHCP
- Click save
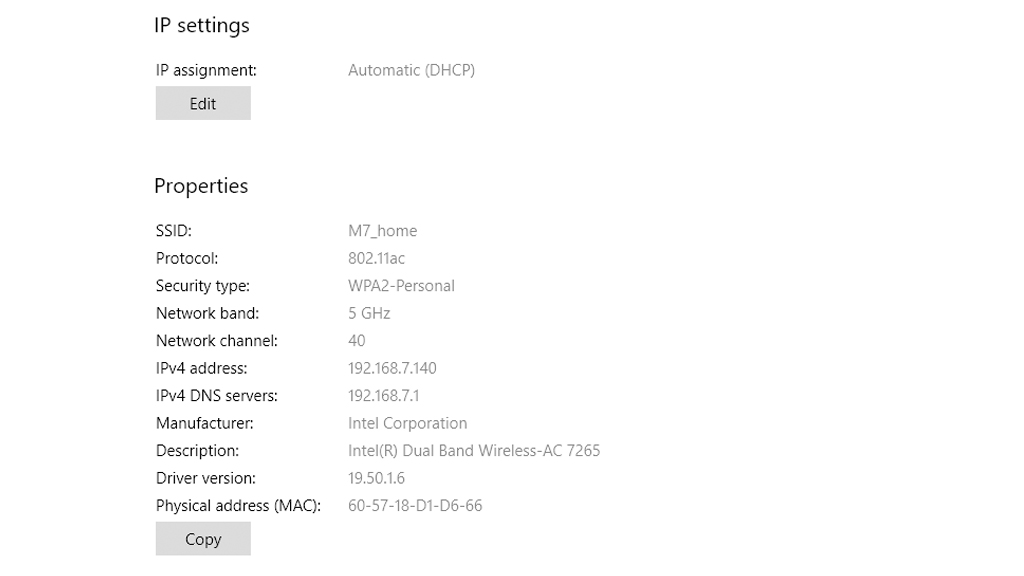
There are two ways to set the IP address of your computer: manual and DHCP. DHCP (Dynamic Host Configuration Protocol) means automatic setting, the manually assigned IP address will not change unless you change it. DHCP will automatically get available and not duplicate IP addresses. The Internet Protocol version 4 (TCP/IPv4) is shown with your IP address.
No IP Conflicts? Additional Steps to Fix Your Network
If you find that your modified IP settings and your network still don’t work, then it’s probably not a problem with IP address conflicts. Since there are many reasons for no network, The following method is also to fix your network. If your network is slow only, you can check the article “How to improve your network” to boost your network speed.
If modifying your IP settings doesn’t resolve the issue and your network remains unresponsive, the problem may lie elsewhere. Network issues can arise from a variety of causes, and addressing them systematically can help restore connectivity. If your network is simply slow rather than disconnected, consider checking our article, “How to Improve Your Network,” for tips to enhance speed.
Method 1: Restart Your Wireless Router
One of the simplest yet most effective ways to resolve network issues is by rebooting your wireless router. While it may seem like a basic step, restarting the router can clear its cache, resolve temporary software glitches, and refresh the network connection. Additionally, this process forces the router to reacquire an IP address if it is configured to obtain one automatically.
Steps to Restart Your Router (and Modem, if separate):
1. Power Off Both Devices: Turn off both the modem and router.
2. Wait for 30 Seconds: This allows residual charges to dissipate, ensuring a clean reboot.
3. Restart the Modem First: Turn on the modem and wait at least one minute for it to establish a stable connection.
4. Turn On the Router: After the modem is ready, power on the router and wait a few minutes for it to reconnect.
Once both devices are operational, check your network connection. Rebooting often resolves minor issues and restores connectivity efficiently. If the problem persists, additional troubleshooting steps may be necessary.
Method 2: Check Your Modem Lights
The Diagnostic Value of Modem Indicator Lights
Many WiFi users overlook the valuable diagnostic insights provided by their modem’s indicator lights. These lights serve as a visual representation of your network’s current status and can play a crucial role in troubleshooting connectivity issues. Understanding and interpreting these lights allows you to identify potential problems and take targeted actions to restore connectivity effectively.
What the Indicator Lights Mean
Under normal circumstances, the WAN (Wide Area Network) indicator light signifies the modem’s successful connection to the broader internet via a wired connection. A steady light typically confirms that the modem is communicating with your Internet Service Provider (ISP).
Similarly, the WiFi indicator light on the modem provides insights into the wireless network’s health:
• Slow, Periodic Blinking: Indicates an active and stable wireless network. This pattern suggests the WiFi is functioning as expected.
• Rapid Blinking or No Light: May indicate issues with the wireless network, such as interference, hardware malfunctions, or configuration errors.
Leveraging Indicator Lights for Troubleshooting
By carefully observing these lights, you can:
1. Identify whether the issue lies in the modem’s connection to the ISP (WAN light) or in the wireless network (WiFi light).
2. Determine if further action, such as restarting the modem, updating firmware, or contacting your ISP, is necessary.
Indicator lights are a straightforward yet powerful diagnostic tool that can simplify the troubleshooting process and ensure your WiFi network operates optimally.
Method 3: Using the Built-in Network Troubleshooter
Another effective way to resolve connectivity issues is by using the network troubleshooter tool built into your device. This diagnostic utility can automatically detect and fix common network problems, saving you time and effort. Here’s how to use the network troubleshooter on a Windows 10 device as a reference:
Steps to Run the Network Troubleshooter in Windows 10
1. Access Settings:
Click the Windows button to open the Start menu, then navigate to the Settings section.
2. Navigate to Network Settings:
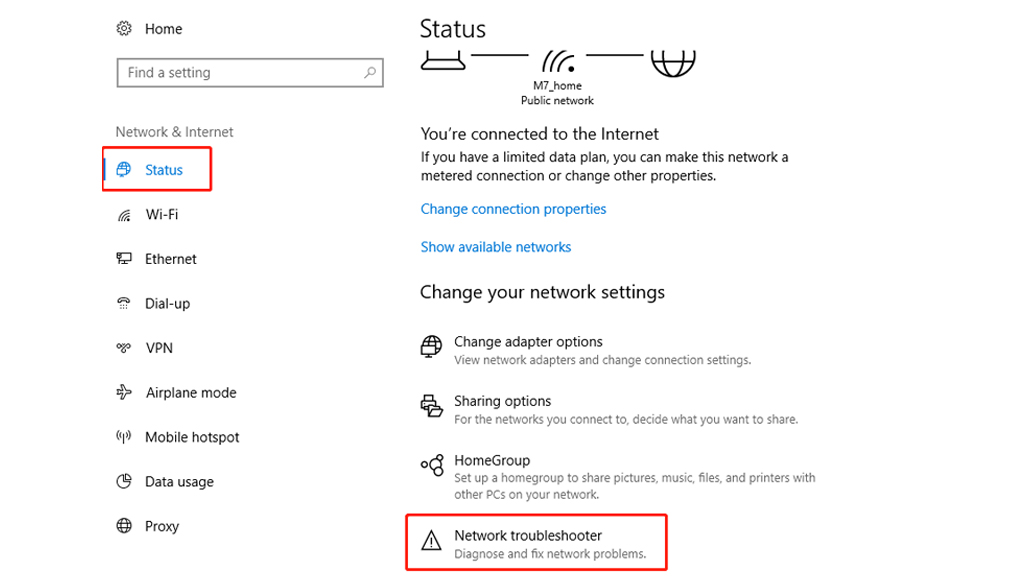
In Settings, select Network & Internet > Status.
3. Launch the Troubleshooter:
Scroll down to find the Network Troubleshooter option and click the button to begin the diagnostic process.
4. Follow On-Screen Instructions:
The troubleshooter will analyze your network settings and attempt to resolve detected issues automatically. If further actions are required, it will provide specific guidance.
For Other Windows Versions
The steps may vary slightly depending on your Windows version. You can refer to Microsoft’s support documentation or search for “Network Troubleshooter” in the Start menu to access the tool on different versions.
Using the network troubleshooter is a straightforward method to diagnose and resolve issues with minimal technical knowledge. It’s a valuable first step before pursuing more advanced troubleshooting options.
Method 4: Temporarily Disable Antivirus or Security Applications
Excessive security measures imposed by antivirus or security applications can sometimes interfere with your WiFi connectivity. These applications may block certain network functions, such as port forwarding, which is essential for data transfer over WiFi. If you suspect your security software is causing the issue, follow these steps to investigate and resolve it:
Steps to Adjust Antivirus or Security Application Settings
1. Access the Antivirus Settings:
Open your antivirus or security application and navigate to the settings menu.
2. Locate the Network or WiFi Section:
Look for a section related to network protection, firewall, or WiFi settings.
3. Enable Network Access:
If there are specific options to manage WiFi or network access, ensure they are set to allow connections. You may also find options to whitelist your network or disable blocking rules.
4. Temporarily Disable the Application:
If the issue persists, try temporarily disabling the antivirus or security software entirely to confirm whether it is causing the problem. Remember to re-enable the software after testing.
Important Notes
• Exercise Caution: Disabling security software can expose your system to potential risks. Only disable it temporarily and ensure your device is not exposed to untrusted networks during this period.
• Check for Conflicts: Some security applications have compatibility issues with specific routers or network configurations. Consider updating the software or consulting its support documentation for guidance.
By addressing potential restrictions from antivirus or security software, you can restore normal WiFi functionality while maintaining a secure network environment.
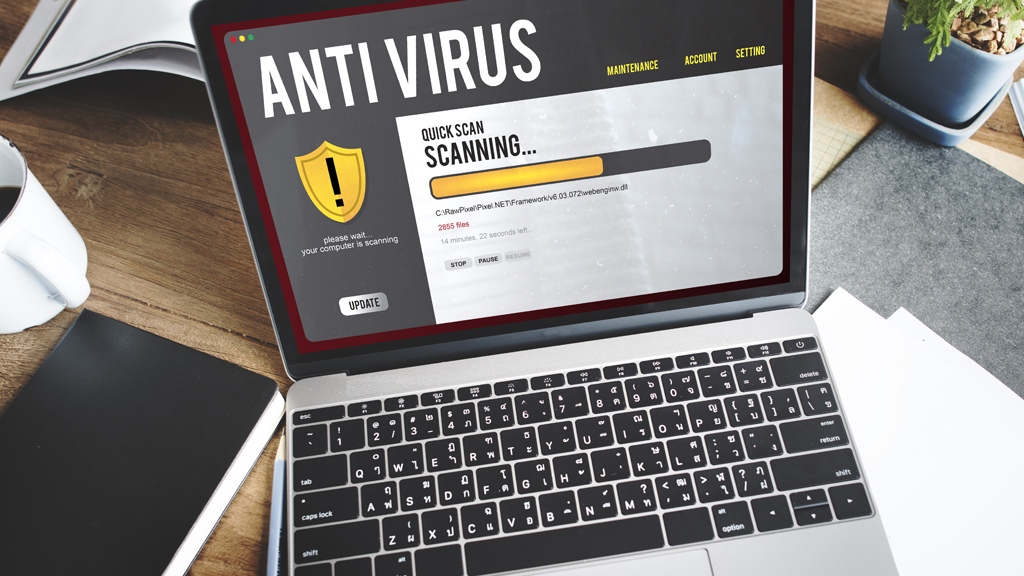
Don’t download anti-virus software at random, restore your Wi-Fi configuration. Don’t download random anti-virus software, some of which will not only clog your network but also slow down your computer and seriously affect your Internet experience.
Note that this is not to say that you don’t need any anti-virus software, or that network security firewalls are unimportant. However, if your computer system is genuine, the computer’s firewall is sufficient to meet most people’s network security needs.
Method 5: Change Your Router’s Wireless Mode
It’s not uncommon for this to be the case that your connected device is too old. For example, suppose you get Internet access on your PC by connecting to the router via an Ethernet cable. In that case, there may be a communication barrier between these two devices. Changing the wireless mode (2.4GHz and 5GHz) is one way to solve this problem.
There are several wireless modes available on the router. For example, you may have seen something like 802.11 b or 802.11 b/g or 802.11 b/g/n/ac/ax, etc. The b, g, n, ac, and ax inside these different parameters represent different wireless standards. Usually, the wireless mode is set to 802.11 b/g/n/ac, which works properly for most users. Occasionally, devices like some older smartphones are not compatible with this mode of 802.11 ax, causing network problems.
In the same vein, the Speedefy KX450 WiFi 6 router is used as a demonstration of operation:
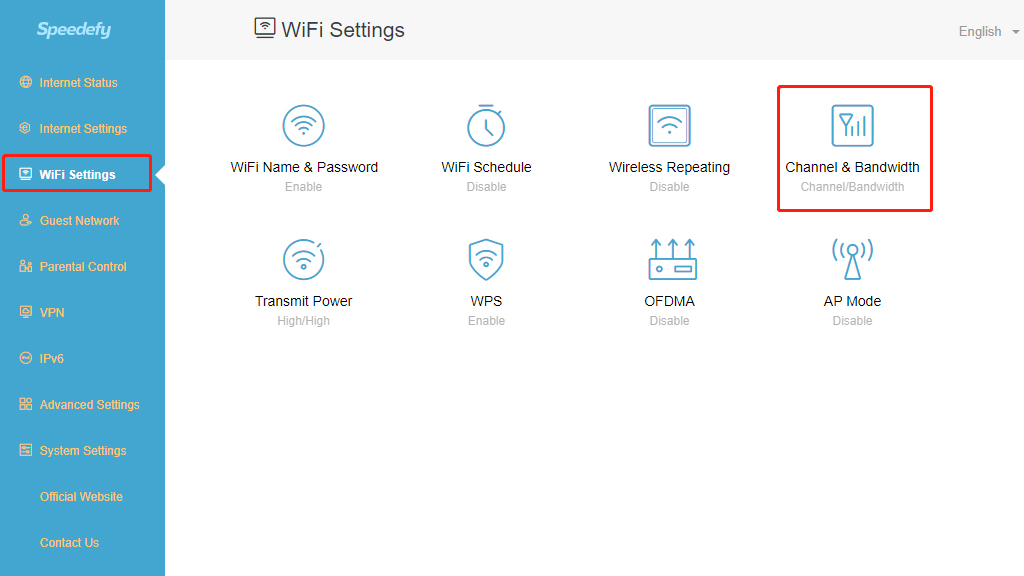
- Log in to the Speedefy router’s web management page
- Chose WiFi Settings > Channel & Bandwidth
- In the 5 GHz Network section: Click the Network Mode
- Change the mode to 802.11 a/n/ac
- Reconnect the WiFi network
Method 6: Reset Your Wireless Router
This option will solve almost all router-related issues. You can reset the router to factory settings, forcing a reset of all new changes that could cause problems. Similarly, this means that you must password protect your router again and change the basic settings to suit your needs.
The reset method varies slightly from router to router, but the sequence of operations is similar. If you have a Speedefy router, you can refer to this article, “How to reset your router.“
The primary sequence of operations for all types of routers is as follows:
- Put the reset button>log in to your router’s web interface>set up the Wi-Fi name and password>Set up your wireless router’s setting as you want.
Method 7: Check If Your ISP Service Has Expired or Is Experiencing Outages
Your internet service provider (ISP) plays a central role in maintaining your WiFi connectivity. If your WiFi is connected but there’s no internet access, it’s worth verifying whether your ISP service has expired or if there’s a temporary outage.
Steps to Address ISP-Related Issues:
1. Contact Your ISP:
Reach out to your ISP to check the status of your account and verify whether there are any active outages in your area. Most ISPs offer customer service hotlines or online support for quick assistance.
2. Verify Payment Status:
Internet services are often prepaid for fixed durations, such as six months or a year. If you’ve overlooked a renewal or payment, your service may have expired without notice. Check your account records and payment history.
3. Check Your Email:
ISPs typically send payment reminders or account updates via email. If you haven’t received a notice, check your junk or spam folder for any missed communications. It’s possible that critical reminders were filtered out.
4. Expired Services:
When your service expires, you can still connect to the WiFi network, but internet access will be restricted. This often leads to confusion, as users assume the issue is with their devices or network.
Proactive Measures:
• Opt for Long-Term Plans: Paying for internet services on a semi-annual or annual basis can reduce the hassle of frequent renewals.
• Set Payment Reminders: Use calendar notifications or app-based reminders to ensure you don’t miss renewal deadlines.
• Enable Notifications: Many ISPs offer SMS or push notifications for upcoming payments or service updates.
By confirming your ISP’s service status, you can avoid unnecessary troubleshooting and ensure uninterrupted internet access.
Method 8: Check Your Wireless Network Adapter Driver
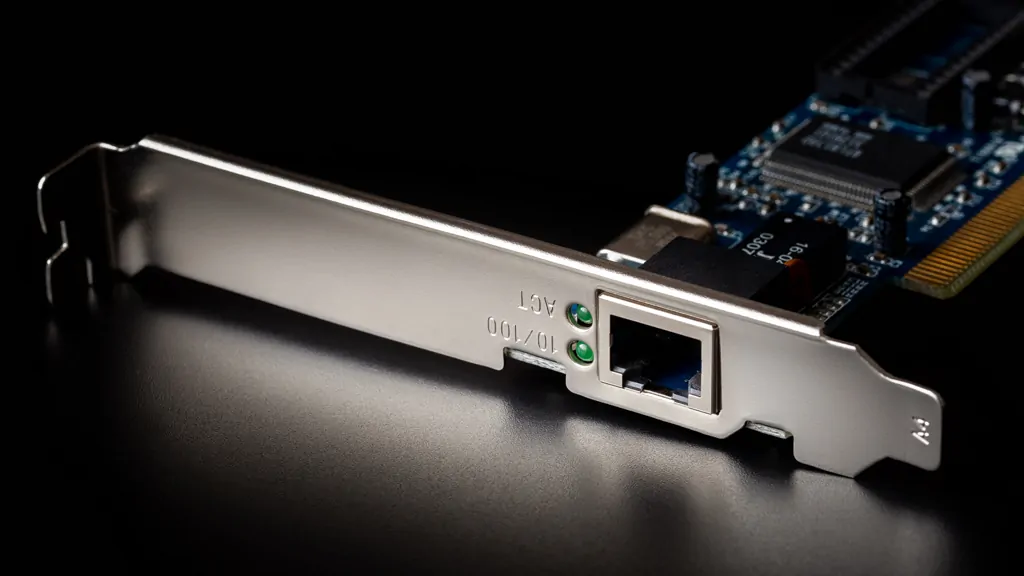
In most cases, WiFi problems are caused by a faulty WiFi adapter driver. In Device Manager > Network Adapters, a WiFi Adapter should be listed under this section if it is working correctly. If WiFi is not listed here, update your wireless network device drivers or uninstall, then reinstall the wireless network adapter.
Method 9: Reset Your Network Settings
And if WiFi still fails to work, reset your WiFi network settings. On Windows 10, go to Settings>Network & Internet>WiFi>Manage WiFi Settings>Advanced Options>Restore WiFi Defaults.
Network reset will remove all Wi-Fi settings like Wi-Fi networks and Wi-Fi preferences that you have saved. This method is straightforward to implement, but the downside is you’ll need to reconfigure your Wi-Fi network after resetting.
Wrap-up: Most Causes Have Been Resolved
There is no single answer to the problem of Wi-Fi being connected but no Internet access. From the most specific IP address, DNS server, ethernet cable connection errors, changes can cause you not to connect to the internet properly, and the tips above should solve most software-related problems. However, you will have to contact a technician if it is a hardware problem – such as a broken wireless network adapter or router.
